Subscribe For Weekly New Recipes!
Peanut Butter Chocolate Marble Muffins with Ferris Nut Co
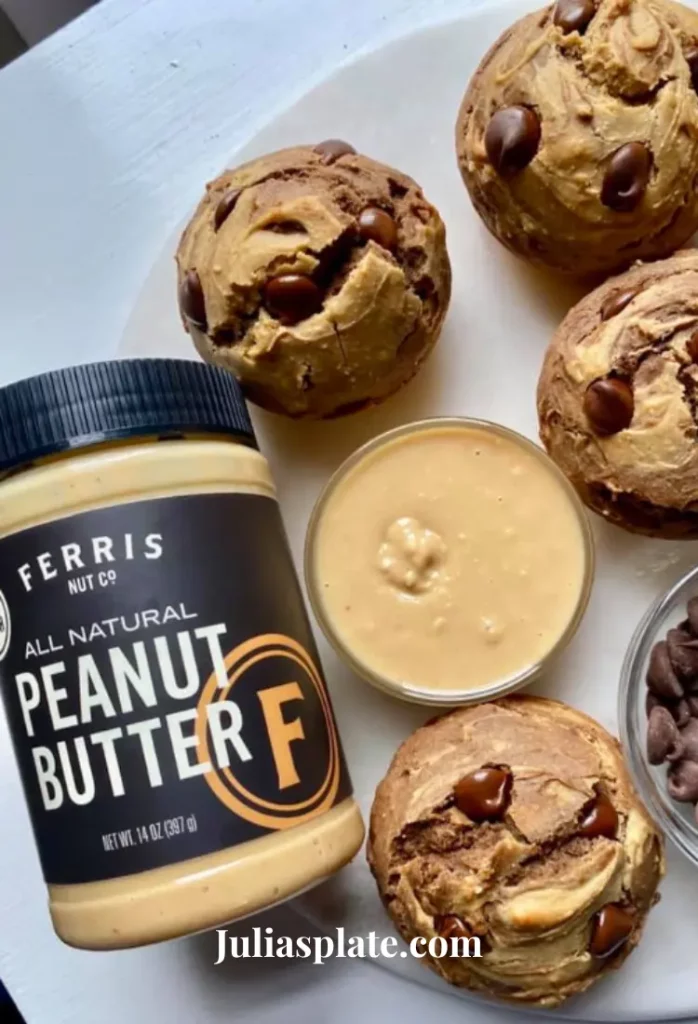
There is nothing better than waking up to some freshly baked muffins and topping them with a spoonful of creamy peanut butter. Seriously, name a better duo than this Peanut Butter Chocolate Marble Muffins…I’ll wait!
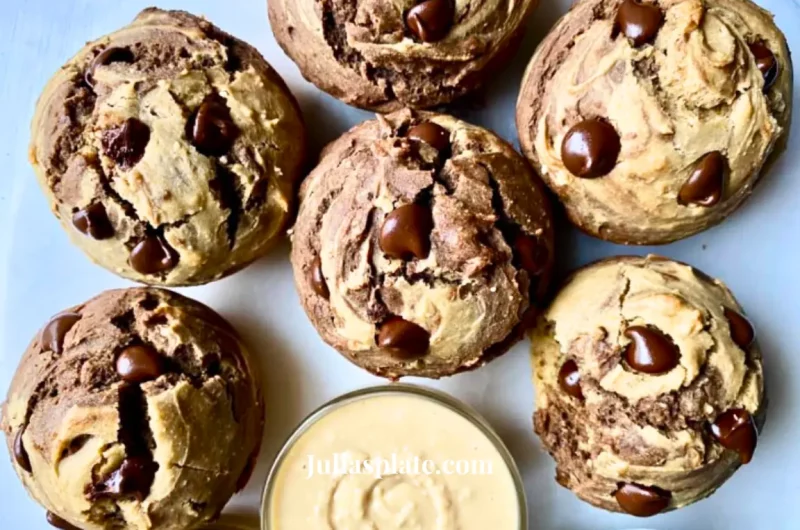
These Peanut Butter Chocolate Marble Muffins are simply life-changing. When my friends tried these, they said that they were one of the best things we’ve baked so far! They’re fluffy and chocolatey, and have the perfect peanut butter flavor swirled with chocolate.
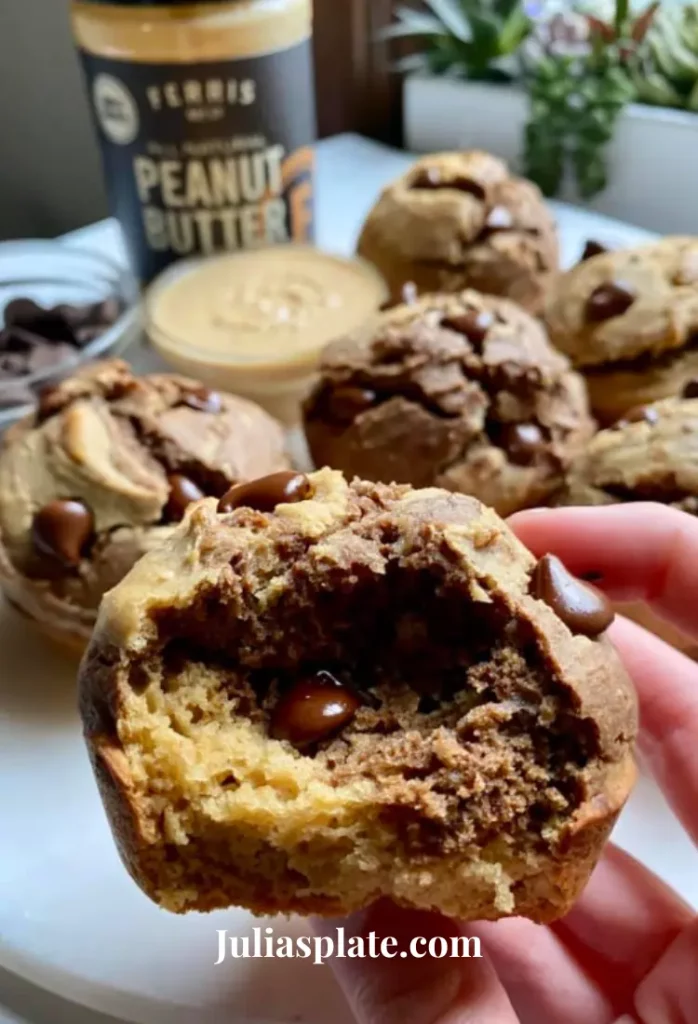
The secret ingredient to make these muffins perfect is Ferris Nut Co.’s All Natural Peanut Butter. This stuff is seriously SO delicious. On a sandwich, toast, in baked goods, by the spoonful, you get the idea. It’s got the creamiest texture that’s blended enough to be super smooth but still has enough texture to make it irresistible.
If you prefer almond or cashew butter, check out Ferris Nut Co.’s All Natural Almond Butter and All Natural Cashew Butter! (These would be a 1:1 substitute for this recipe as well) Now, let’s get down to business…muffin business that is!
With just 11 ingredients, two mixing bowls, and 22 minutes in the oven, these muffins will be on your table in no time and with no stress.
Ingredients
Wet Ingredients
- 2 Eggs
- 1/4 cup Maple syrup
- 1/4 cup Coconut sugar
- 1/4 cup Almond milk
- 1/3 cup Peanut Butter
- 1.5 tsp Vanilla extract
- 1/4 cup Melted coconut oil
Dry Ingredients
- 1.5 cups All-Purpose Gluten-Free Flour (Not packed)
- 1.5 tsp Baking powder
- 1/8 cup Cacao powder
Kitchen Equipment You’ll Need
- Oven
- Microwave or stovetop
- Mixing bowls
- Measuring cups and spoons
- Muffin tin (I used a jumbo muffin tin from Target)
How to Make these Peanut Butter Chocolate Marble Muffins
- Preheat Oven to 350F: Ensure your oven is preheated for the perfect bake.
- Lightly Grease a Muffin Tin: Use a light cooking spray or line the muffin tin with paper liners.
- Combine Wet Ingredients: In a mixing bowl, combine eggs, maple syrup, coconut sugar, almond milk, peanut butter, vanilla extract, and melted coconut oil. Stir until well combined.
- Prepare Dry Ingredients: In a separate bowl, combine gluten-free flour and baking powder. Keep the cacao powder aside for now.
- Combine Wet and Dry Ingredients: Add the dry ingredients to the wet mixture and stir until thoroughly combined.
- Separate Batter: Divide the batter evenly into two bowls.
- Add Cacao Powder: Stir the cacao powder into one bowl until fully combined.
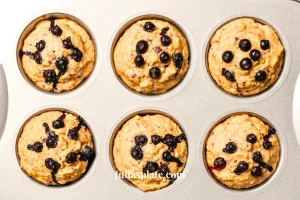
- Layer Batters in Muffin Tin: Alternate between peanut butter batter and chocolate batter in the muffin tin, reserving a small amount of both batters for a swirl effect.
- Create Swirl/Marble Effect: Use the reserved batter to create a beautiful swirl by gently mixing it through the muffin cups.
- Bake: Place the muffin tin in the preheated oven and bake at 350F for approximately 22 minutes or until a knife comes out clean.
Tips
- Seriously the most important tip is to add some extra Ferris Nut Co. Peanut Butter on top of a warm muffin FRESH out of the oven…life changing!
- Make sure not to pack the flour! Just scoop into a measuring cup and level off with the straight edge of a knife!
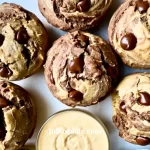
- Add a few more chocolate chips to the muffins after they come out of the oven by pressing them into the tops, for that perfect melty-chocolate look
- Test if your muffins are done by sticking a knife in and making sure it comes out clean, with no uncooked batter sticking to it. I like to use a small, sharp steak knife for this!
- To get the perfect chocolate//peanut butter marble swirl, start with a layer of the PB batter, add a chocolate layer, then top with another PB layer. But, save a bit of each batter so that you can add to the tops of each muffin after they’re filled up. Then use a sharp knife or toothpick to swirl it up!
- Store these muffins in a loosely-covered container for 1-2 days, then freeze and defrost to enjoy.
- If you don’t have muffin tin liners, no worries! Just lightly spray the tin with Pam or grease lightly with coconut oil. The muffins will pop right out, you’ll save some paper, and no leftover muffins will get stuck to the paper liners…a win-win situation if you ask me!
What to Pair with these Muffins?
Pair these tasty muffins with a glass of cold milk or warm hot chocolate for a cozy meal. My little girl, Sofia, was so happy enjoying them with hot chocolate, and it brought joy to my heart. For a sweet twist, try them with a scoop of vanilla ice cream for a tasty mini dessert. And for a quick and easy breakfast option, savor them with a glass of refreshing orange juice or a cup of creamy yogurt.
FAQ
Can I use regular flour instead of gluten-free flour?
Feel free to substitute all-purpose flour if you don’t require a gluten-free option.
Can I freeze these muffins for later?
Yes, these muffins freeze well. Place them in an airtight container, and they’ll stay fresh for up to one month.
More sweet recipes: Healthy Copycat Junior Mints.
Conclusion
These muffins are a tasty mix of peanut butter and chocolate that everyone in your family will love. Share the recipe with your friends, and remember to subscribe to my blog for more yummy desserts and sweet recipes like these muffins.
Peanut Butter Chocolate Marble Muffins with Ferris Nut Co.
Course: DessertCuisine: AmericanDifficulty: EasyServings
6
servingsPrep time
20
minutesCooking time
22
minutesCalories
300
kcalTotal time
42
minutesThese Peanut Butter Chocolate Marble Muffins are a must-try! I was surprised at how yummy and soft they are. I enjoy every bite, and now I need to make them every week. Even my husband loves them! If you like desserts, these muffins are perfect to try.
Ingredients
- Wet Ingredients
2 Eggs
1/4 cup Maple syrup
1/4 cup Coconut sugar
1/4 cup Almond milk
1/3 cup Peanut Butter
1.5 tsp Vanilla extract
1/4 cup Melted coconut oil
- Dry Ingredients
1.5 cups All Purpose gluten-free flour, (Not packed)
1.5 tsp Baking powder
1/8 cup Cacao powder
Directions
- Preheat oven to 350F.
- Lightly grease a muffin tin.
- Combine eggs, maple syrup, coconut sugar, almond milk, peanut butter, vanilla extract, and coconut oil in a mixing bowl.
- In a separate bowl, combine gluten-free flour and baking powder. Keep cacao powder to the side!
- Add dry ingredients to wet and stir until thoroughly combined.
- Separate the batter evenly into two bowls.
- Add cacao powder to one bowl and stir until combined.
- Layer batters in muffin tins, alternating between peanut butter batter and chocolate batter (I did PB, chocolate, then PB). Reserve a small amount of both batters to create a swirl/marble effect at the end.
- Bake at 350F for 22 minutes or until a knife comes out clean.
Notes
- Seriously the most important tip is to add some extra Ferris Nut Co. Peanut Butter on top of a warm muffin FRESH out of the oven…life changing!
- Make sure not to pack the flour! Just scoop into a measuring cup and level off with the straight edge of a knife!
- Add a few more chocolate chips to the muffins after they come out of the oven by pressing them into the tops, for that perfect melty-chocolate look
- Test if your muffins are done by sticking a knife in and making sure it comes out clean, with no uncooked batter sticking to it. I like to use a small, sharp steak knife for this!
- To get the perfect chocolate//peanut butter marble swirl, start with a layer of the PB batter, add a chocolate layer, then top with another PB layer. But, save a bit of each batter so that you can add to the tops of each muffin after they’re filled up. Then use a sharp knife or toothpick to swirl it up!
- Store these muffins in a loosely-covered container for 1-2 days, then freeze and defrost to enjoy.
- If you don’t have muffin tin liners, no worries! Just lightly spray the tin with Pam or grease lightly with coconut oil. The muffins will pop right out, you’ll save some paper, and no leftover muffin getting stuck to the paper liners…a win-win situation if you ask me!